

The FG knot, or Super FG knot as it was originally called, was invented by Giant Travelly fishermen who were having issues with their fishing knots slipping on the super hard fighting fish. These large inshore fish can get longer than 4 feet and heavier than 180 pounds and swim up to 60mph. So they came up with how to tie the FG knot, with a lot more surface coverage of the leader line. This gave it not only greater strength, but a smaller profile and more gripping power to avoid any slippage or pulled out knots.
But be forewarned; it’s not the easiest to tie. The tension needed as well as the multiple wraps, half knots and tapering wrap stacks adds a lot of work to get a good knot. I often use my foot, mouth and both hands to tie it.
What does FG Stand for?
It has since been adapted by professional bass fishermen looking to get the thinnest knot that will easily go through their guides but also resists slipping or breakage on light line applications. The FG actually stands for Fine Grain because the appending line is almost woven onto the main line with this knot. The result is one of the strongest and thinnest knots that resists slipping.
Why Fish the Super FG Knot?
When you are fishing ultra clear water, you often want lighter lines and longer leaders. That means you will need a small but strong knot that has to travel through your guides. So if you’re using 10-pound braid and 6-pound leader, but you might have to tangle with a 6-pound rambunctious smallmouth in current, you’re going to need to be sure your tiny line is not slipping in your fishing knot.
How to tie the FG Knot
The thing with tying the FG knot is you need to be able to keep a mainline tight at times. But also you need to keep it’s tag tight while you wrap the leader under and over the mainline on tension. Then you give the braid a little slack and pull the fluoro tight to let the braid slide up the line and lock in place. Me personally I like to put the tag end of the braid in my mouth and put my foot on the other end of the braid to create a tightened line to wrap against. Then I usually do the wrap under towards my foot which is towards my rod tip and then back under towards me.
Then I repeat that 20 times and then tie it off with cascading half hitches to finish it off.
For visualization, I will include step by step illustrations to demonstrate.
Step 1 – Create tension on your braided line
This step is fairly straight forward. You need a way to keep your braided line semi tight so it’s efficient to wrap the fluro back and forth on it, but lose enough to force the wraps from the braid to slide up onto your fluoro leader as you pull it back tight. I will sometimes put the braid going to my rod under my foot and put the tag end in my mouth and then I can control tension by just leaning forward or back in my seat. You start with the braid tight and wrap under and loop back over and go under the other side. Then you give the braid a little less tension so as you go over and under and then pull the fluoro tight it sends the wraps up your fluoro line. So you are keeping tension the whole time to lock the wraps in as they slide up the line.
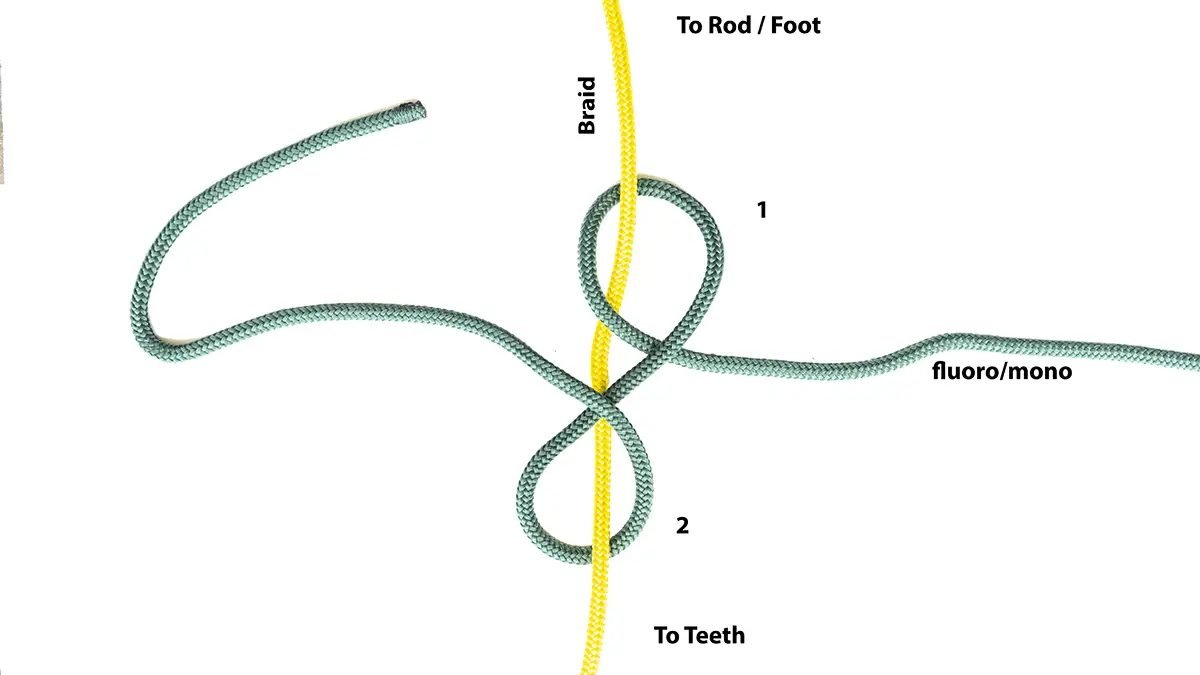
Step 2 – Begin your wraps
After you get your braid set, start with your fluorocarbon leader over the top of the braid and with a long length of tag end, begin by taking the tag end under the braid towards your rod (or my foot in this case) and then wrap back over and then under the braid towards your teeth and then back around and under the braid towards your foot again. Each time you go under on one side and under on the other side, that’s consider two wraps. And each wrap you need to force tension into the wrap of the braid as you pull the fluoro leader tight. You will repeat this over and over, being careful to pull your fluoroleader tight each wrap so that the the braid wraps tightly up the fluoro leader as you do it.
Step 3 – Pull the fluoro leader tight after each wrap
As you wrap under each time, you give the braid a little slack and pull your fluoro tight so that the braid wraps up the fluorocarbon leader each wrap series.
Step 4 – Continue under over wraps
Continue with your under and over wraps forcing the braid up the fluoro leader each time you complete the wraps on either side of the braid with your fluorocarbon leader.
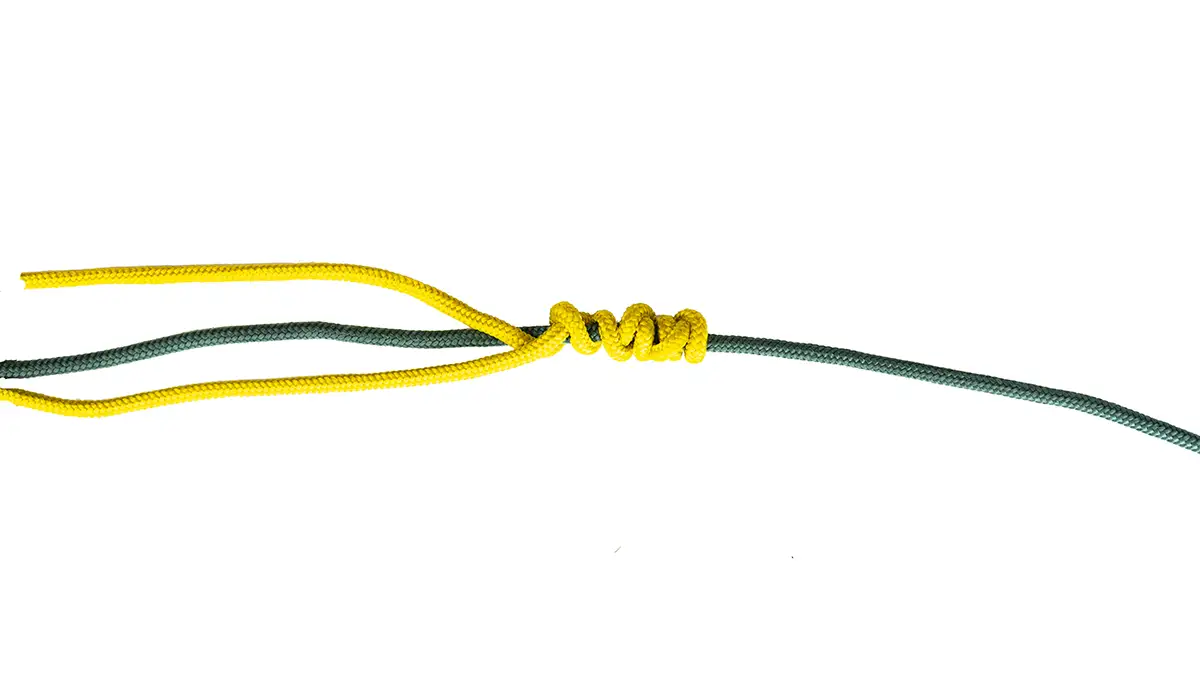
Step 5 – Wrap the braid up 20 times
Continue with your wraps, going under the braid towards your rod, and then under the braid towards your teeth. So as you do both each time that’s two wraps. Do that 20 times so that you have ten to each side of the braid and you end up with a bunch of criss crossed wraps up the fluoro leader. You want to keep them tight after your wrap each time because the goal is to create a finger trap that bites into the fluorocarbon. So the harder you pull the tighter its grip is on the leader.
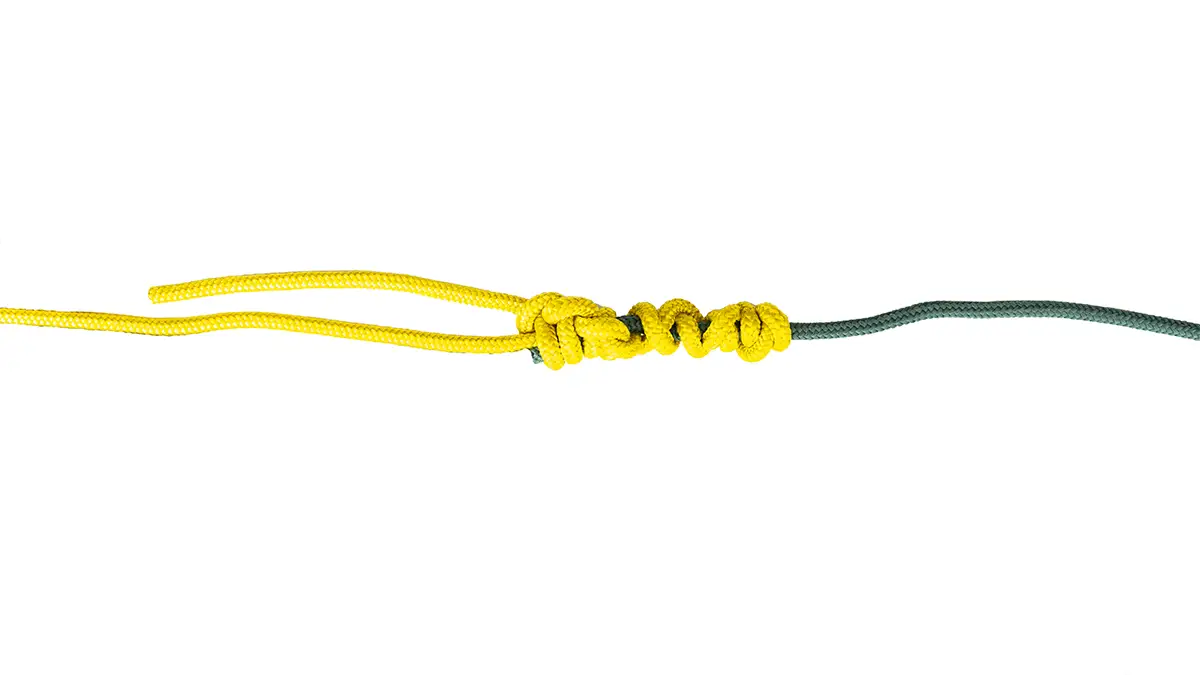
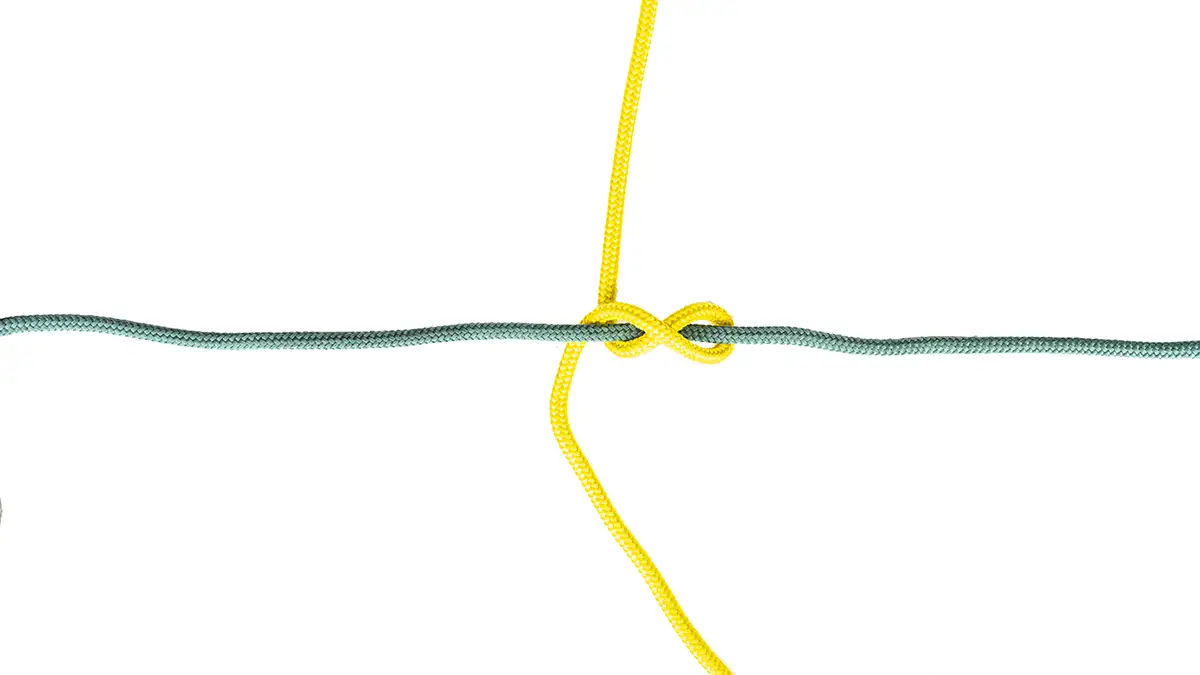
Step 6 – Tie 4 half hitches around both lines with braid
Once you have completed your 20 wraps, tie it off with a half hitch around both lines with the tag end of the braid. That will keep your wraps from backing out on you. You can check the tightness of the knot here. You should be able to pull down on it some and it not move much if you’ve tied it right. Seal off this part with 4 total half hitches around both lines with the braided tag end. Be sure to really cinch it down tight each time so when you’re done you can pull very hard on both ends and make sure it holds. Then trim your fluoro tag end off tight to the knot.

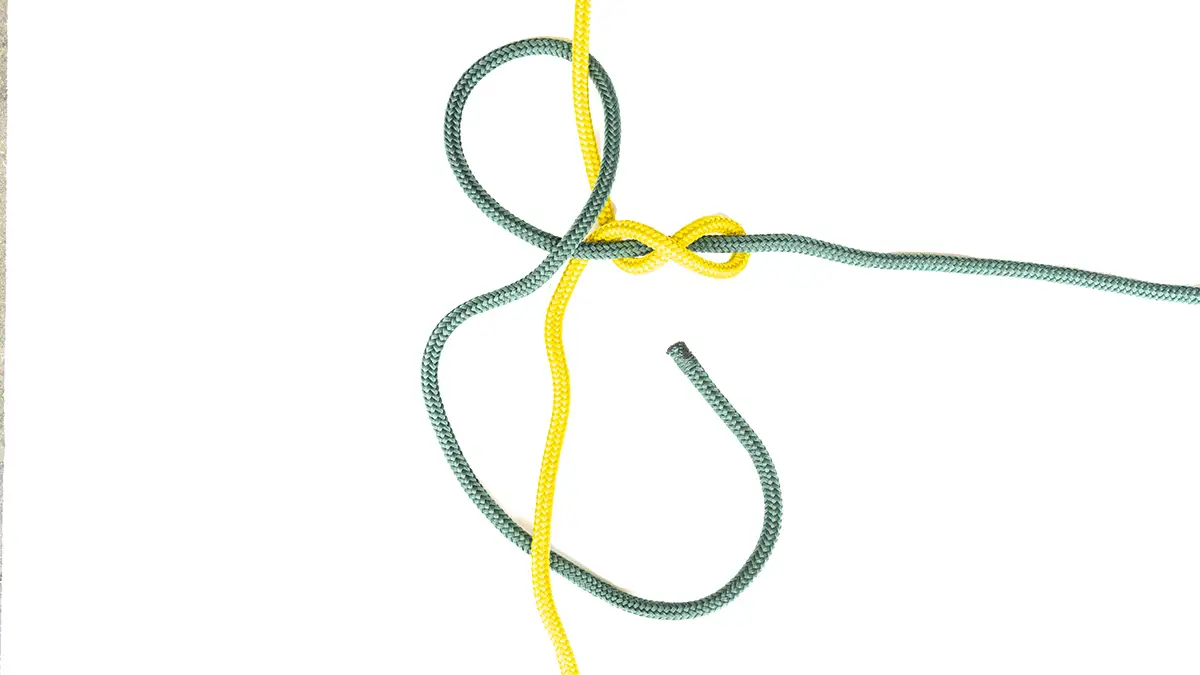
Step 7 – Finish with a few more half hitches
After you trimmed the fluorocarbon tight to the knot, tie a few more half hitches in front of that with just the braid on itself. This will put a smaller knot in front of the end of the fluorocarbon leader. It not only keeps more of the knot from slipping, but it also helps guide the knot through the guides with no resistance. Basically what you’ll notice at the end is your wraps are tight. Then, the half hitches lock it in with a little big thicker profile. Next, it tapers down to a few half hitches in front of the wraps. With a final step down again with half hitches in front of the fluorocarbon leader end. So each step down locks in the last.
As a final step some folks will trim the tag end and then deal with fraying and what not. However, you can actually use a lighter and burn back the tag end to keep it from fraying. Just protect the knot with your fingers and fuse the tag end of the braid back a little so it won’t unravel on you.
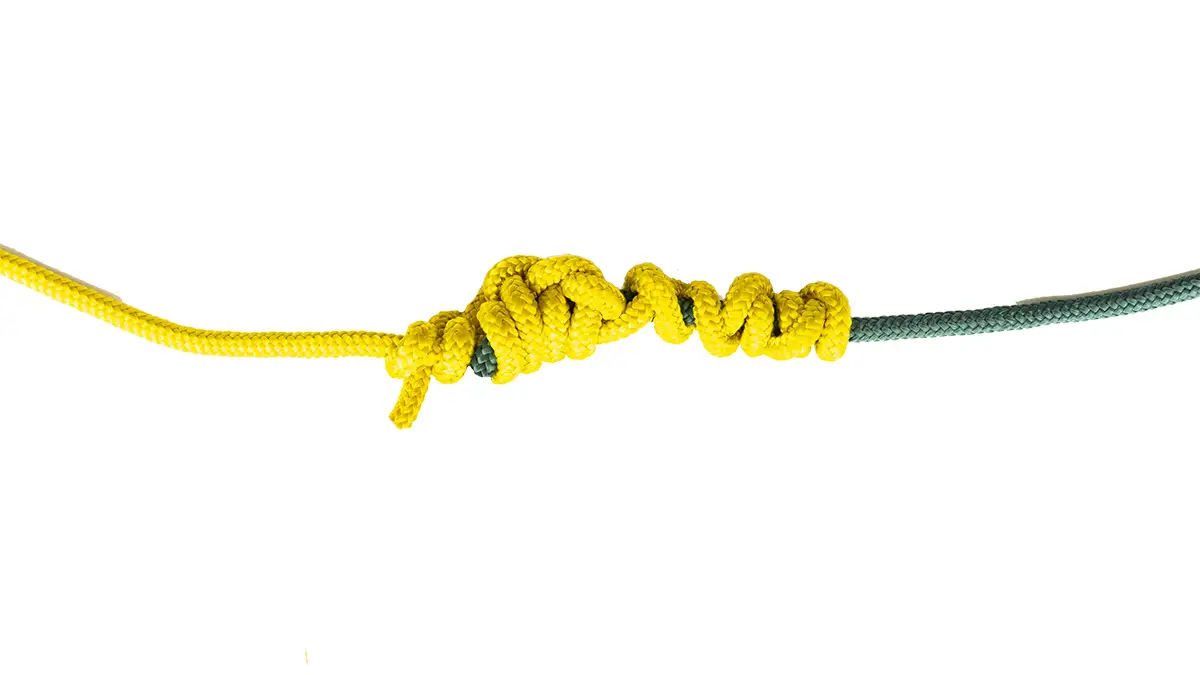
You’re left with a super thin knot that slides through the smallest guides with ease. Plus, you have a ton of surface area to get a good grip on the leader.
Video Instructions on Tying the FG Knot
It definitely takes some practice, and if you’re like me watching someone tie it helped a lot in the beginning.
I highly recommend you watch this video from Seth Feider on tying the FG knot as we’ve explained above.
Other Fishing Tips with FG Knot
The key is keeping tension on your line but allowing the braid to wrap up the leader line while locking each wrap in tight. And then sealing with half hitches to lock it in so you can pull it all tight together to get that initial bite on the leader. Spend some time playing with your tying technique at your house and eventually you will get to where you can tie it in 30 seconds. But it takes time at first to get really comfortable with the setup and moving through the process with tight wraps, tight half hitches, tight tag end trims, etc. But you’ll be blown away by the FG Knot on strength and castability through the guides. It’s a very good knot with a lot of good applications for bass fishing and beyond.
To learn more great knots like this one, check out our Best Fishing Knots Every Angler Should Know piece.


